Monday, 30 April 2012

Sunday and Monday's work

Not a lot to be seen here as it is mostly second coats of paint.
Pictures in order of appearance:


Bedroom - papered across the doorway.  Can't do the third wall as I need to make a chimney breast which means I have to buy wood and also a fireplace - suffering from the knock-on effect.


Kitchen with the (mock) lincrusta in place.  The gap on the back wall is for the sink and cooker which will have tiles behind.  I found a site today and copied a tile I liked and scaled it down and then repeated it endlessly.  I hope to be able to figure out how to print it on to glossy paper.  The test piece (ordinary printing) looked excellent.  There will be a dado rail along the top of the paper.  

As you can see Ellen has had the chimney breast bricked up when the range was taken out.  In these sort of Victorian terraces it was usual to have shared chimneys.  You would have a chimney breast running through one side of your house for you and your neighbour and then the other side of your house your walls would be flat because your neighbour on that side had the chimney breast in their property.  

Sometimes you will see lots of gaps at the tops and bottoms of walls.  I am trying to leave some unpainted wood for when I come to stick on the various trims.


Salon.  The only room I have managed to get three walls papered.  This is taken after cutting out the arch of course.  The trim for that has become an issue.  If I get a trim made it will encroach on the cornice that I want to put around this room... soooo???


The shop.  Not sure if this shows you anything but for my records it is the second coat of paint which is an improvement on the first but not perfect.  The rough edges at the top will be covered by a paper border/frieze.


Parlour.  Pretty birds and berries paper.  I was a bit fussed about this one as it came up in a mass of bubbles (!).  Luckily it did dry out and shrink back OK.  There is a painted frieze in the cream background colour.  This room will have cornice and picture rail.  Again the third wall has been left because I need to build the fireplace.  I am being even more ambitious with this one as I also want to make built in cupboards either side of the fireplace.  Ken and I are old enough to remember these!  We aren't actually Edwardian but it seems they lingered on a long time.  Again, in this photo there is another doorway is papered over.


The workroom.  This one just needs the picture rail trim.  Thank heavens a room with three walls tackled.

This room leads neatly to today (Monday).

Ken did a tour of inspection this morning and asked if I had taken the roof off to do the top rooms (it isn't glued on yet).  Did I heck.  

I laboriously worked out where to cut this border so  the pattern would match in the corners and then I realised just how difficult it was to place a long thin strip of wet paper right up against the join between the ceiling and the wall without wrinkling, ripping or slanting it.  With all that in play the pattern match went out the window.  Needless to say when I removed the roof this morning to have a look I realised how easy it would have been if I'd thought to do that yesterday.


This is my Monday contribution - the lincrusta.  Following the not removing the roof debacle I went on to do the first coat of green paint on the paper, using a brush.  It was truly awful.  Strike two and the day had only just started.  When it was dry (and still looking dreadful) I masked of the whole area with paper and masking tape and gave it a second coat with a roller.  What a relief, the paint finish is so much better.  The only couple of problems I now have is that it seems to have pretty much obliterated the raised pattern in the paper and I have no idea how to put a shine on the matt paint, which is the whole point of having lincrusta - i.e. a wipe down surface.  Please can anyone tell me what I use to 'varnish' the surface of matt emulsion to get a shine?  On wood I know I can use liquid wax and buff it up but I have no idea how this would work on painted paper.

Saturday, 28 April 2012

Never trust a painter

True to form the decorator (aka me!) spent more time messing about than painting today.

Honestly I wasn't playing with stuff.  I thought if I put in the few bits and bobs I have, along with the imaginary ones, I might have a better idea of what I want.

This proved really useful and convinced me to have chimney breasts in the sitting room and two bedrooms to add some interest and to make the fireplaces more realistic.  The shop and salon wouldn't (necessarily) have had fireplaces and the kitchen has had its chimney breast knocked out when the range was removed in favour of the gas stove.  Very few people would countenance having gas fires or gas lights in their bedroom.  They had a bad reputation (at that time) for making people ill and even killing them.  This was actually true as carbon monoxide poisoning and the importance of ventilation wasn't properly understood and fires weren't vented properly. Ellen also kept the sitting room one because she liked a 'proper fire'. 

It also gave me a bit of a new idea for the kitchen.  I will be using the lincrusta (intended for the staircase) for the lower half of the walls, painted green.  It was very popular as a cleanable surface.  The lower back wall behind the cooker and sink will be tiled.  All this will be topped with a dado rail and the upper walls will be a creamy colour (maybe with a border).

I also did a second coat in the shop and salon, first coated the workroom, painted the frieze in the sitting room and painted the upper walls in the kitchen; so not too shabby for a late start.

PS:  Got a parcel I have been waiting for for ages.  If you want to see the contents have a look at the last seven pictures in the Bentleys Purchases photo album.

Friday, 27 April 2012

The decorators have arrived

By 4 pm on Tuesday it was all glued so I was very restrained and left it alone for the requisite 24hours.  By 4 pm on Wednesday I thought it was too late to start on the painting!  

Thursday we had visitors so it became Friday and the 27th.  Most of the day was taken up with thinking (procrastinating!) which is incredibly hard to photograph.  Every time I thought I would set off and do some painting I found a problem which needed sorting first - where would the frieze be in this room?  How high would the picture rail be?  Is there a cupboard being put in there?  How tall are the shop shelves I haven't bought yet?  Will I be able to get coving above them?  Do I want coving above them?  You get the gist.  

Eventually I just decided to crack on with painting the shop.  This meant I also had to paint the stairwell.  You can't imagine how many incarnations this stairwell has had in terms of coving, picture rail, dado, painted lincrusta (anaglypta to those of us born after the Edwardian period), and assorted borders and where they should go.  I took the line of least resistance and just painted the lot! 


 Never mind I could just get on with papering the salon as I knew that just needed paper and no faffing around with trims and borders. Hah!  Am I putting a fire/chimney breast in the salon?  OK, I can paper two walls!  The arch has disappeared temporarily.  I'm not looking forward to cutting that out tomorrow.

Tuesday, 24 April 2012

New toy

I keep meaning to show you my new (ish) toy.  It is an 80 piece rotary tool set I bought in the States for $10.  Seriously.  I haven't a clue what to do with any of the bits and bobs in it and the book isn't a great help.  I've trawled the web for Dremel/Rotary tool kit information but I haven't come up with a comprehensive - this tool does this - type article/video.  Meanwhile for ten dollars what the heck I'll get some use out of it.  The first planned job is drilling holes through the ceilings for the lights.  This shop kit has grooves pre-cut but they haven't put a hole through.  I presume this is so you can decide precisely where you'd like your light.  That, of course, leaves people like me making a thousand decisions and none of them actually being carried out.  I dithered about with a few bits of furniture before gluing the floors in place but still couldn't come to any conclusions.  I hope this toy is the answer.  I can actually get the thing vertically in the space available after the build and make a hole when I know what I want.....  if I ever do know what I want.  I have actually bought two lights for the attic rooms and now think they look too big in situ.  I have to come to a decision about those pretty soon as they will need grooves in the roof and they definitely need doing before the roof is stuck down and the tiles go on!  Tomorrow is another day...........

Tuesday and we are glued

...  and another scary step is done.  The main carcass is all glued together.  

spent a while trying to be sure which way the stair landings went in.  Initially I was misled by having painted the floor as though it was the ceiling!  Honestly even with endlessly labelling everything as I go it seems I still don't get it right.  I suspect the landings were in the wrong way round in the dry build as I didn't fuss so much about that.  At this stage I placed the stairs in and they seem to work OK.  The roof is only put on, not glued on; I thought it might help to keep things all squared up while it dries.  Now all I have to do is not fiddle with it until after 4 pm tomorrow.  The glue itself was a bit of a concern as it seemed very patchy in the flow - like it wasn't mixed up properly.  I just hope that isn't the case or, if it is, that it doesn't matter.

This is the back view.  The edges need painting; they all will.  When I was painting I decided to leave all the edges so I didn't have to work out what was being glued or what colour each edge needed to be.  I assume it won't be hellish to go round touching those in further down the line.  It doesn't look so patchy in the vertical.  Tomorrow it will have a home in the sitting room.  I have resisted that all along so far, but have finally weakened.  It really will be a pain to have to move a house out of the spare room when anyone stays and there is no way they can both stay in there with visiting humans.  The prospect of lugging a heavy house from one room to another and back again is grim.  Even more irritating would be the endless dressing and redressing of all the bits and pieces which will fall around every time it is moved. So this one will be in the sitting room announcing my obsession to all and sundry.

The logistics of the ongoing build are a bit untidy.  I need to keep the house indoors away from damp and extreme temperature changes, but I also need to be doing things like painting, decorating, fitting trims and doors etc.  All this sounds like a lot of trotting back and forth between my spanking new workroom at the end of the garden and the carcass in the house.  I suspect there are going to be many more times when it will be squatting on my work surface in the kitchen challenging me to see to it or bake a cake!

[I posted this and then had to retrieve it as I realised I hadn't said thank you to Ken for being my other pair of hands and (quite often) for being totally my brain.] 

Monday, 23 April 2012

Paint and Pudsey

The build has overrun the house again.  So much for my workroom.  I am far too worried about having MDF in the shed so I decided to play safe and do the construction in the house.  This means the kitchen is under siege again and the sitting room takes the post painting recuperation pieces.  Both these pictures only show part of the areas which are infected with Bentley's.


As you can see I primed the large carcass pieces front and back with a thin rollered coat of B & Q's Value range emulsion.  Fingers crossed this was the way to go.

I started with the piece top left of the photo. You might be able to see how patchy this is.  I was using a brush so I could leave an edge all round (worrying about gluing it together).  Absolutely hopeless.  It is thin and patchy and all over the place and I still couldn't work out where I should leave an edge; so I gleefully gave up, whipped out my lovely soup ladle(!) and proceeded to use a small roller.  It was all done in under an hour.  This was Thursday.


Saturday we went to Pudsey.

It is about an hour's drive from where we live so a good one to go to in that it is the first I can do when we get back and it is near to home.  It was a particularly useful one for me too.  I ordered a stack of stuff from Jennifer's of Walsall for pick up.  We also arranged to meet the purchaser of Le Tout Paris and hand it on.  It was actually sad to see the little sweetie go but we really do NOT have room for three houses.  We are currently trying to work out what to do with two.

I think Pudsey is a good enough show.  Not everything can be on the scale of Miniatura and their ilk and there is enough there to keep me occupied from 10.30am until 2.00 pm (with half an hour for lunch). 

I managed to get everything on my shopping list such as floors, wallpaper, trims and other  practical stuff so that I can crack on with the build.  I did pick up a few bits and pieces that weren't exactly essential but were nice and at the right price.  The trouble with any show is that it increases my discontent with my champagne taste and beer pocket.  People like Sally Meekins (pottery) and Danny Shotton (knives and tools and more) who not only make exactly to scale with precisely the right thickness materials but also create beautiful pieces in themselves.  They would be very special collectors pieces in 1:1 world.  If you don't know their work - check it out.

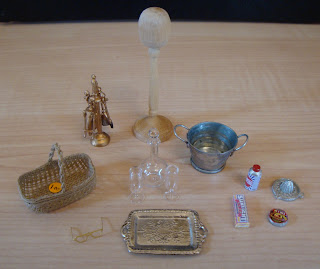
As an example Danny Shotton's companion set was £34.50 and to die for.... my little companion set was £4.50.  I rest my case.  I bought a decanter and two glasses for sherry (to go on the sideboard).  I don't want to go to the trouble and expense of buying the magic water stuff and colouring to go in the decanter so it will contain actual sherry.  Not sure how that will work out(?)  Again a real sherry decanter and sherry size glasses cost an arm and a leg.  My Ellen is making do with stuff as she isn't especially interested in making a lovely home above a shop.  She is beginning to think about all kinds of future ambitions such as her own fashion house, not just the shop and perhaps a house/proper home of her own.

Back to reality and on Sunday I went paint shopping for the colours. 

Before this I had to denib all the sides ready for their second coat.  Easy peasy and very satisfying  I did the second coat of white on the ceilings before going out for the paint and was feeling very pleased with myself.  Did you like 'denib'?  I even get to learn new words doing this.  If you don't already know it just means use fine sandpaper to rub off the bits which get raised by the paint.

As for the trip to Homebase... What a nightmare!  I had already chosen a whole raft of Farrow and Ball colours which were just perfect but I could only get their sample pots in Estate Emulsion which is a 2% sheen - a flat a matt as can be - it is sort of chalky looking.  This is great for interior walls as it nicely replicates tinted distemper, but makes it useless for other things.  The sample pots are £4  each and then I would have to buy a silk acrylic varnish and a gloss one to change their finish.  I ended up compromising where I could and bought some Farrow and Ball sample pots and a couple of other makes.  


I painted the front pieces with a mortar colour to go under the versi brick slips.  These have come up fine.  I am thinking about putting splodges of other colours on here and there to dirty up the mortar so it isn't just one shade coming through between the bricks.  My real house is only about six years old and none of the mortar on that is one uniform colour.


These are the quoins!  I mixed one teaspoon sand with four teaspoons of paint to give it a rough stone finish.  I got my sand from a dollar shop in the States from the flower arranging section.  It is very fine white stuff.

I am truly unhappy about the quoins.  As you can see there are four strips; these go down the front of the building.  I can't find any images of buildings with this sort of finish.  I searched and searched through Georgian and Victorian neo-Georgian and there's nothing  like it anywhere.  I never intended to use them even when I first chose the kit BUT on close inspection of the construction I don't think I can avoid it.  Firstly if they are left out, the lining up of various other elements becomes difficult.  Worse there is a visible gap, four of them actually, where they run through the bay window 'roofs'.  Leaving them out would mean remaking a couple of difficult pieces which I know I can't do.  The third problem seems even more intractable; one of them acts as an overlap to conceal the join where the two front pieces meet.  I think it might look strange without this trim.  Hey ho, so much for reality and accurate historical research.

I also did the first coat of paint on the sides and back of the carcass using a roller and smooth masonry paint.  It was an appallingly patchy finish. This paint is a tad more gloopy than normal emulsion but it had been commended to me for the job (via a magazine article) as ideal.  I lived in hope of a better finish by using a brush for the second coat.  Another caution if you are considering this paint - it has a pungent smell and you could do with some open windows in the room where you are using it.  The other reason for buying it was that it seemed to be the ONLY paint which came anywhere near to brick red - strangely enough it is called Brick Red!  I had got a pretty good match to my (future) bricks from - you guessed it - Farrow and Ball in a £20 size can.  This Homebase sample pot cost £2.59 and I still have about a third left, so it seemed like a no-brainer.

And so to Monday.....

These are the three brick red pieces with their second brushed coat.  They are certainly a long way from perfect but probably tolerable after all they are the sliced through brick sides of a terrace.  I hope so any way.

 Mmmmmm.... now I am really worried about painting the rooms inside when the house is built.  Obviously I can only use a brush in there and these are the sort of results I look as though I am producing.  Doesn't matter on the under-the-slates roof paint shown here, but clearly it will look awful on the shop wall and the landing walls.

I am pinning my hopes on the fact I did these with a brush that's about forty years old (!!!) and couldn't be described as great .  Maybe if I buy a good quality small fine hair brush I can get a better finish. I am also thinking I might let the paint down a little and do two thin coats.  Any opinions welcome.

As someone who has never done any decorating in real life, never mind one twelfth, I am in virgin territory here and not doing at all well.

Hopefully tomorrow I will be starting the gluing it all together nightmare.  Wish me luck.

Thursday, 19 April 2012

Edwardian House Style

I have just got the most fantastic (reference) book from my local library.  I heartily recommend it to anyone 'doing' an Edwardian property.  It is as much American as English (maybe a tad more?) but it is pretty much interchangeable.  It is called:

Edwardian House Style Handbook by Hilary Hockman

If you don't read a single word in it you will still have 240 pages absolutely crammed with pictures and, as you know, they are worth a thousand words each!

Wednesday, 18 April 2012

Welcome to Helen

Welcome to Helen.  Thanks you for adding yourself to my followers.  What incredibly talented things you do.  I am soooo flattered you took time out to visit.

Monday, 16 April 2012

Change of Name

I am sorry to have changed the name of the Blog and I hope it doesn't drive anyone too crackers trying to find me. There's a couple of reasons.

The first is an 'emotional' one.  Since last September when I bought the Honeychurch shop, I have lived with its image in my head and it soon got conjured up into Le Tout Paris.  The two things seem to be bound together - the Honeychurch is Le Tout Paris.  Having just sold it, it feels as though Le Tout Paris has gone with it.  The idea of a fancy, 'Frenchified' dress shop seemed more suited to its pretty face than it does to the Lyddington.  This new shop seems to squat there, smugly full of English robustness.  It is a double-fronted Georgian shop which has evolved through time into a solid respectable Edwardian business.

The second reason is a pedantic one.  The more reading and research I have done about Edwardian drapers, milliners and dress shops in small towns the more I have come to realise that it would be very unlikely for anyone to call their shop anything 'fancy'.  Shops were generally known by the owner's name.  So, Le Tout Paris becomes Bentley's.

It would be daft for me to continue chattering about it in a Blog called Le Tout Paris!

As far as I can tell I have thirty people on an email list who I notify every time I add a post to the blog.  If you'd like to be added to this list just send me your email address.  I have some readers using an RSS feed so they know when something new appears, but it is probable that I have many more of my readers just stopping by now and again using the Blog address.  These are the people who might lose me now I've changed the name.  I was able to do a bit of fiddling about and I kept Le Tout Paris address and I have put a link to this new place.  They should find their way from there.  I hope no-one falls by the wayside thanks to my whimsical notions. 

With apologies...


Procrastination is the thief of time...

This is a quote you shouldn't look up the rest of (like I just did) It is too depressing.  It does however describe where I am and what I am doing.  I spent six long months exiled from my Le Tout Paris project and arrived home bursting with ideas and enthusiasm.  I then talked myself out of the Honeychurch and into the Lyddington on the basis of refurbishing seemed like too much work and my half a year's accumulated ideas were bigger than the premises allowed.  So there was a brief pause waiting for the Lyddington to arrive.  It has now been with me twelve days and all I have done so far is a dry build of the basic carcass.  Even this has been dismantled awaiting painting and gluing back together.  

Each day I find another excuse not to start.  I truly haven't given up on it I just feel overwhelmed by the prospect at this stage.  Ken keeps reminding me I have done it once before so it can't be beyond me; but the first one was done in a state of innocence.  It was a very simple, externally finished, click it together Dolls House Emporium kit and I had no greater ambition than getting it to stand up and be stuck together in all the right places.  This time I want it to be more like a miniature than a dolls house and I keep finding one stumbling block after another.

Here's my 'progress' so far.

... and so the build begins....


This is one terrifying flat pack Lyddington.  Looks nice and controlled here; not so when you take the shrink wrap off.  There are a zillion bits all clammering for attention.  You will meet them all, no doubt,  as I pootle along.

How did that nice little pack become this?


Here's the carcass up and running courtesy of some masking tape.  You might notice that the build is being done in the kitchen (again!) and not in the new workroom.  I chickened out and decided that it might be best to keep all the pieces indoors.  I am concerned that a cool and possibly damp area isn't a great place to keep MDF and expect it to stay in shape.  If anyone has built MDF stuff in a shed and then kept it in a house afterwards without any problems PLEASE let me know so I can get it all back out there.  The plan now is to do work on individual pieces outside and bring them in each day!!

I then labelled each surface to identify it.  It sounds daft and probably is if you can keep three dimensional images in your head when working on something; I really don't do well at that!  As soon as each piece becomes a single flat piece I have to really think about where it goes, which way up and what it might need to finish it correctly.


This is the back wall with all its little labels - see I forgot one!  Now you may be saying this is potty because you have to take them all off to size the MDF before building.  Correct!

Worry not I have a cunning plan....

I transcribed all the notes onto the parts sheet which came with the kit.  Had there not been diagrams of all the parts I would have just taken a photo of each piece on my iPad and referred back to that if and when necessary.


This is another big worry - I haven't a clue how to go about making the stairs and putting them in place.  I have four (half) sets of stairs which need spindles and rails and newels.   I plan on painting all the bits and then gluing them together to make something which looks like a staircase; preferably one which doesn't look as if it was built by a navvy on a drunken binge.  Even if that is a success, how the heck do you then manage to get those dainty, wibbly-wobbly pieces glued to the strange cut outs in the house and then add in the other bits of rail needed to complete a dog-leg staircase.  I just don't know.  The song I keep singing in my head is that others do it all the time so it must be possible.  I'm not convinced. Help and tips please????? 


So until I actually make a decision on what to size the MDF with that's it for now.

I spent an pleasant hour or so picking wallpaper and paint for every room and have that comfortably settled.  I have also chosen the colours for the mortar to go under the versi-bricks, paint to go under versi-slates and paint for the exterior woodwork.  You might know I have also created a problem for myself with these choices too.  I want to use Farrow and Ball colours.  I like the paint, the choice of finishes and their colours BUT I don't want to buy Farrow and Ball tins of paint as they are very expensive.  Like most manufacturers their sample pots (£3.95 each!) only come in one finish which is OK for some things but not all.  I have emailed to ask if they would sell me small pots of a range of heir products.  I don't really expect a yes, so then it will be back to the drawing board for me.  Yet another delay.

Thursday, 12 April 2012

A Room of One's Own


My little hut is all newly painted (not that it really needed it).  Big thanks to my other half who did more than his fair share.  The floor looks a bit strange because I couldn't wait for the paint to dry to take the photo! I have a friend visiting tomorrow but I am so mad keen to move into my new workroom I hope to be up early enough to do it before she arrives.

I wrote that on the 10th and never actually managed to do that but by the 12th I was home and dry.

Unfortunately it is too far from the house to get wi-fi connection.  We are changing providers next month, so I live in hopes.  Meanwhile I have a brilliant Ikea corner table which gives me masses of room.  Two little metal sets of drawers (their cheapest at £24 each) and two sets of their cheapest shelves (£12??).  Right now I have more space and storage than I need.  I suspect that might change as I bowl along.


Saturday, 7 April 2012

My advert on EBay for the Honeychurch

I have put the Honeychurch up for sale.  It cost me seventy pounds plus the cost of the trip to pick it up and a table to put it on.  Just in case you are interested (or anyone you know is interested) it is in the Dolls House section of EBay and looks like this.


This is a rare opportunity to buy a lovely shop made by Honeychurch.  These are few and far between and are rarely complete.  This one has everything. There is nothing missing and nothing broken.  It has been finished and used as a dolls house rather than a collectors piece and could go straight back into use as that but it would make a wonderful starting place for a miniaturist looking for something special.  It is made of plywood - no MDF in sight.  The base measures 23 inches by 15 1/2 inches.  If you email me I am happy to send precise measurements of each room or any other details you want.  I can also email more detailed photos if you need them.

There is the normal amount of wear on an item which has been used.

Pick up only is advisable.  This is from Bury, Lancashire (near Manchester).  If you want to arrange shipping that's also fine. 

I am happy to accept a PayPal payment or cash on collection.  No cheques please.

Thursday, 5 April 2012

Exciting stuff...

My Lyddington shop arrived yesterday.  As of now I have resisted going at it like a whirlwind - my usual approach.  As I mentioned previously I want a space to work in and we need to get on with that first.  It is very hard though as I am itching to at least do the dry build so I can get an idea of its size.  I have absolutely no spatial awareness skills and can never actually visualise the volume of anything in a space, so it is nigh  on useless giving me dimensions - yes, I understand them but, no, I can't visualise them.

I don't really remember assembling the Wentworth and I wonder if I was as fazed by the seemingly zillion bits of stuff in the package.  If anyone out there has built stuff and has any tips I'd be so grateful for your help.  I am mostly concerned about what parts I should paint or paper or whatever BEFORE assembling or whether I should just throw up the building and go at it from there.  Painting the ceilings before building seems reasonable but after that I'm stuck.  I've trawled the web but get conflicting and incomplete notions from what I find there.

I have two sets of dog-leg stairs (no spindles or rail).  I don't see how these can go in and then add the handrail and spindles in situ and then try to paint them - surely it would be better to build and paint the stairs first and then put them in?

Last time I worked out which internal walls were to be painted and which to be papered and did that before building but it wasn't all that easy to get right and I was only papering the back wall so there wouldn't be a problem with any corners having gaps.

As for the outside; the last project came painted and papered from DHE.  I am tackling this one myself.  I am veering towards versi slips for the brickwork as there won't be much of it.  I shall paint the side walls (to match the brick) as they would be attached to the rest of the terrace in reality.  Not sure if I can run to versi slates for the roof but would love to do so........  again suggestions welcome.  I'm not confident I can use the pressed card sort of things and then paint it realistically which is another option I've considered.

I want to leave out the quoins which come with the kit but I also want to add window sills inside and out and don't know how to go about that either.

I am assuming a silk emulsion rather than an oil base for the exterior woodwork????

As for the work space.....

It is freezing cold and neither of us want to go out and work in the garden getting the summerhouse cleaned up.  I know summerhouse sounds grand - it is just a shed with a lot of glass but if I call it a shed that conjures up another image so I'll have to go with summerhouse I think.  Anyway it needs a wash and then a paint job before I can move in.

We have just got back from a trawl round Ikea buying the 'furniture'.  I sussed it out on line first.  In fact I nearly ordered it on line and the delivery would have cost £35 (!!) which was a lot on low priced items. My smarty pants other half suggested we go and have a look at the stuff and make sure it is what I want.  It turned out that getting it from the shop and arranging the delivery there only costs £15 and it will be here tomorrow.

I'll take photos as we go along and tell you the saga .

Meanwhile lots of little EBay bargains are still arriving.  Today's haul was a music stand and, from another seller, I got three lovely little jugs.  I decided it seems a bit daft just showing you screeds and screeds of stuff as it arrives.  The photos get added to the online Le Tout Paris contents album so if you are curious you can just check in there now and again and see what I've got so far.  

Something I don't understand is how a business in Shanghai can sell me a music stand for £2.99 (free post) and mail it by a fast method which is signed for on delivery at this end. Where is the profit in this?

As you can see I have a zillion thoughts going on at once and that's only the dolls house - don't even get me started on the garden which is desperate for attention and a real life kitchen that needs a rethink/rebuild.  All of which needed doing yesterday as far as I'm concerned. 

I don't sleep well!!