Wednesday, 30 November 2011

2. Main No.3 Gas Cooker c.1890

As I did say these information pieces weren't going to be step by step instructions (kits already have them) there isn't much to add in this second part of the 'notes' on building this cooker.  The pieces went together fairly well and there was a lot of scraping paint off to glue pieces together and then a lot of retouching the paintwork.  I also found the gas taps extremely fiddly to try and glue in place between the gas pipe and the cooker top and it was impossible with epoxy resin and I reverted to my good old standby - Super-glue Gel.  I love the brass finish from Martha Stewart's metal paint - the downside being it cost something like $5.99 and I've used three or four tiny dips with a fine brush.

I don't understand why a manufacturer makes something as daft as five teeny gas taps with two different shaped holes on either side which you can barely see, let alone tell the difference between a 'flanged' hole and a plain one.  These then have to be glued and held in parallel between two pieces of the kit.  Surely they could have been moulded in with the gas cooker top?  Looking out for these sort of issues when you are deciding to buy something would be nigh on impossible as you've no idea of the construction until you open the box.

Epoxy resin is suggested as best for these models as it is rock solid when dry but if the object in your house isn't going to be handled much I don't think this is an issue.  If I did this one again I would probably use epoxy (the five minute kind) for the main build as the material is so heavy and I think it might need a strong fix; but  I would certainly take my chances with Super-glue Gel for the fiddly bits for speed and easy application.  At this stage the paint seems to have gone over any Super-glue which might have escaped on to the surface.  This was my concern when I decided against using it initially.

I chose a Martha Stewart Satin acrylic paint for the black which I really do recommend.  I have used a few different makes of acrylic paint for things over the years and this one went on like a dream.  That could be, in part, to my having primed it first?  The original real cooker was a high gloss black enamel (?) finish but I never like a high shine at 1/12th.  It doesn't seem to work - maybe even shines need to be reduced to 1/12th?  So it has a very slight sheen.   I think it could stay like this as it won't be handled very much but I might give it a satin lacquer finish when I get it home to make it more durable.

I am disappointed that such a complex and expensive piece wasn't made with a door which opens and closes.   Like my modern appliances in the Wentworth I would have liked a pie in the oven and a door which opened.  You have to choose - glued open at 90 degrees or glued shut .  This creates a multitude of problems for positioning it in the house.  I decided at first to have it open as it was a shame to lose the detail of the interior and the racks and drip tray.  I thought Daisy could have left Ellen an apple pie cooling/keeping warm in the oven for after her cold supper.  She would have to leave the door open as there was no regulator in those days so you couldn't just turn the temperature down.  Then I realised which ever wall it went on it would present a problem.  On the right I couldn't see what's in the oven, on the left I wouldn't be able to see the best side of the door; it might work if it was facing me but I don't really want the cooker on that wall....  and so on. 

As the reason for writing this is to point out the problems/difficulties it does read like a long list of grumps whereas I quite enjoyed making it after the first half hour during which I would have paid anyone anything to present me with a finished object.   I didn't find it too difficult considering I wasn't using five minute epoxy which would have been soooo much easier and I am happy with the finished cooker.  The detail is excellent.  On which topic you will perhaps have noticed I haven't picked out the RAM initials  (door, two sides and grill front) in white paint.  I tested my potential for doing this by choosing my finest brush and tracing over the lines with it to see how good/bad I was - talk about waaaaay off.  To be perfectly honest it may not, therefore, be historically accurate but I do like the appearance of it better without the white letters.  That's my excuse and I'm sticking to it.

When it was finished I considered ageing it in some way as in this story it is something like 20 years old.  It came from the big house (see the narrative).  Then I remembered my mother's cast iron, grey and white speckly vitreous enamelled  gas cooker that she had for more than forty years.  It, quite literally, still looked like new when she reluctantly had to abandon it when she moved house. She never did reconcile herself to her spanking new modern one and she was quite right in that it wouldn't last a tenth of her previous well-loved and much used oldie. So Ellen's can remain her pride and joy until she exchanges it for one with a regulator some time in the future.

In summary I wouldn't recommend making something like this as a first try with pewter models.  Something small and fairly simple would have been better to get the feel of the materials and what I could and couldn't handle.

PS:  The doorknob needs some clear nail polish.  I used that for the black enamel grill pan (under the grill) and it worked well.

Two more to add to the collection

These are probably the last two bits I shall buy before returning to the UK for Christmas.  I do have something else in the post on its way to me here which has been hatching since last August but you'll have to visit Wentworth Court to see those when they arrive.  I also have a birthday gift from my sister and brother-in-law on the way to me in the UK and they are for LTP.  I'll tell you about them when I have them.

The vase is much thinner and prettier than it appears here and a bargain.  Someone on E-Bay sells very beautiful wood and equally lovely resin turnings, but they start at $9.99 upwards so....   you must get fed up of hearing me say ''too pricey for me'' - so just take it as read if I like something and don't get it that it must be etc.  This one, and only this one ever, came up at 99 cents.  I do wonder if it was just mis-priced?  I ordered it and here it is.  

The desk wasn't a bargain and is a bit roughly finished and too shiny for my liking - I might give it a rub down with wire wool now I've discovered its magical properties.  I bought it because it should fit the space properly and offers nice opportunities for dressing it with papers etc as there are several layers to it.  Basically it will look much better when I've had a go at it.

1. Main No.3 Gas Cooker c. 1890

The picture is what I'm working towards, not my finished effort!

This is the crucial build for me.  Again I have never built any kind of metal figure or even painted one so it is all a first.  The worrying part is that (for me) this is a pricey piece of kit.  I first saw a picture of it built and painted and looking lovely on a site for £65 and started a search to see if I could find it for less.  Ultimately I found the unfinished kit with Phoenix Models.  I think they charge £35 for it.  I managed to pick it up at a show for £25.  So far, so good.   By the time I add in the cost of primer, acrylic paints, glue and a few basic tools there's almost another £13 to calculate in to the finished cost.  So DIY might save me £27 if it is successful or lose the same plus the cost of a cooker if not!  Fingers crossed.

I've scoured every place I can think of to get some idea of how to go about making this but the only half-way decent instructions are for painting action figures of various sorts.  From these I gathered that the process is usually: 

 - rub off the excess bits of metal from the moulding process
- wash in soapy water and dry well
- build the kit using epoxy resin (also new to me) and leave 24 hours
- prime with car primer (some say not to bother??)
- paint with acrylic or Humbrol enamels.  I chose to use acrylic as it is supposedly easier to get a good finish if you are new to painting models and also I can, worse case scenario, get all the paint off easier than trying to remove enamel.
- finish (or not) with a sealer coat

It seems,doing this stuff, each piece you read contradicts the next and, of course, people favour all sorts of methods which have worked for them but this doesn't necessarily mean they will work for you.

As soon as I started this kit the Phoenix instructions differed from the above list.  There was no mention of cleaning up the metal after removing the excess bits.  As pretty much everyone else had insisted (and common sense dictates) that if there is any grease (from handling for example) or dust from filing, the paint won't take very well.  So my bits of cooker got a good wash and brush up.

The kit also then says to paint certain pieces (and not others) before gluing and then it begins to tell you what to stick to what. At this point it then says to remove the paint in the areas you need to join!  This is a total impossibility.  The joins are only a little more than paper thin and there are occasional locating pips and holes.  The pips are little more than a pin point (literally).  I couldn't find any way to clean up such infinitesimally small areas successfully so I had to clean off more than I needed in hopes I can touch up later.  Already I think if I ever have to do anything like it again I will build it first and spray paint it afterwards and just hope I can reach all the areas I need to.  I had no idea of how much glue to use as it is new to me but I think the least glue is usually the best when building stuff, so I've spread it very thinly.  Already with the paint interfering and the teeny amount of glue used  I'm not convinced I will have any success with the bonding of the pieces but I won't know until tomorrow as epoxy takes 6 hours to firm up (24 to set solid) and I started this late this afternoon.  Big life does keep getting in the way of 1/12th.

Monday, 21 November 2011

The House of Miniatures fourth and final part ... to be continued

I went out today to buy wood glue and some sort of finishing product to complete the build BUT I've decided to take the bits home and finish it there (and the others yet to be built here).  To explain to those who haven't a clue what 'here' and 'there' might mean I'd better explain.  

I am English and live in the UK from April through September and then spend the other half of the year (October through March) hiding from the winter here in Florida.  My two doll's houses and loads of stuff for them are, of course, in the UK.  The first motivation for making these House of Miniatures pieces of furniture was to be frugal.  This isn't working out all that well:  I bought them at a good price from E-Bay and then I spent an arm and a leg on tools and products to complete them because everything I need is 'at home'.  

When I was standing, as always,  perplexed by 'foreign' products in Lowes and considering which finish to buy I finally absorbed that they ranged in price from $6 to $10.  I decided it was totally daft; I know I have a satin finish varnish that I am happy with back home, so the lowboy can just wait until I get back.  We have a short break in the UK over Christmas.  If I get a chance (visitors' and Christmas permitting) I'll finish it off and write up the last episode for you when I get back in the New year.  As I said it is a cost issue but it is also such a waste - so much stuff gets left here when I get home (and the other way round) because I don't want to be carting paint and glue and varnish and tools back and forth with me; it does make more sense to divide the work somehow, rather than keep duplicating and wasting stuff.  This peripatetic life does have its drawbacks. 

PS: as for my not having a clue what yellow wood glue is my husband looked at me as if I were certifiable and immediately produced the bottle we already have!  So I can continue to build and stain and seal and glaze to my little heart's content with no additional expense.

Sunday, 20 November 2011

3. House of Miniatures - wire wool and glazing


Three or four people who read this commented on how patient I must be fiddling around with these teeny pieces.  Here's a snip of a reply to one of them:

     - I am well known for chucking things (literally) when they've annoyed me for more than a couple of minutes - not advisable with small children! I want everything to go perfectly first time and instantly, that is wholly my temperament, so it is a huge surprise to me that not only do I stick this out but I get some sort of perverted pleasure from it.  It also does seem to be only minis that have this effect - for example I had a teeny banging-around-the kitchen mardy a couple of days ago when everything I touched I seemed to spill or drop and the lunch was one disaster after the next.  Patient I am not.

Those who know me well know this to be true.  I wonder if any of you who mess with miniatures have discovered the same?

So, to day three in the saga (!) - see what I mean about being patient - and at last I can crack on with the next stage.

The first step was to rub everything down with 0000 wire wool - aaargghhh! typing this I just realised I didn't do the drawer boxes!!!

Back to the plot;  I loved this process as the wood soon becomes deliciously silky and all the little bumps and 'gritty' bits disappear.  I know this was the point of the process but when you are doing something for the first time you don't quite appreciate what you've been told until you actually do it.


I mentioned Kris (from the new added blog I am following) and her excellent advice.  One of the things she mentioned was that tacky glue was not a good choice and it wouldn't really hold pieces firmly.  How right she was.  Two seconds into wire wooling and I had a detached leg and finial.  Yes, I did support them well and handle them carefully - just listen to Kris and not to me - do not use Tacky Glue to build your kit.  She suggests ordinary (yellow) wood glue - a mystery to me as yet but I'll let you know how much and where from when I find it.

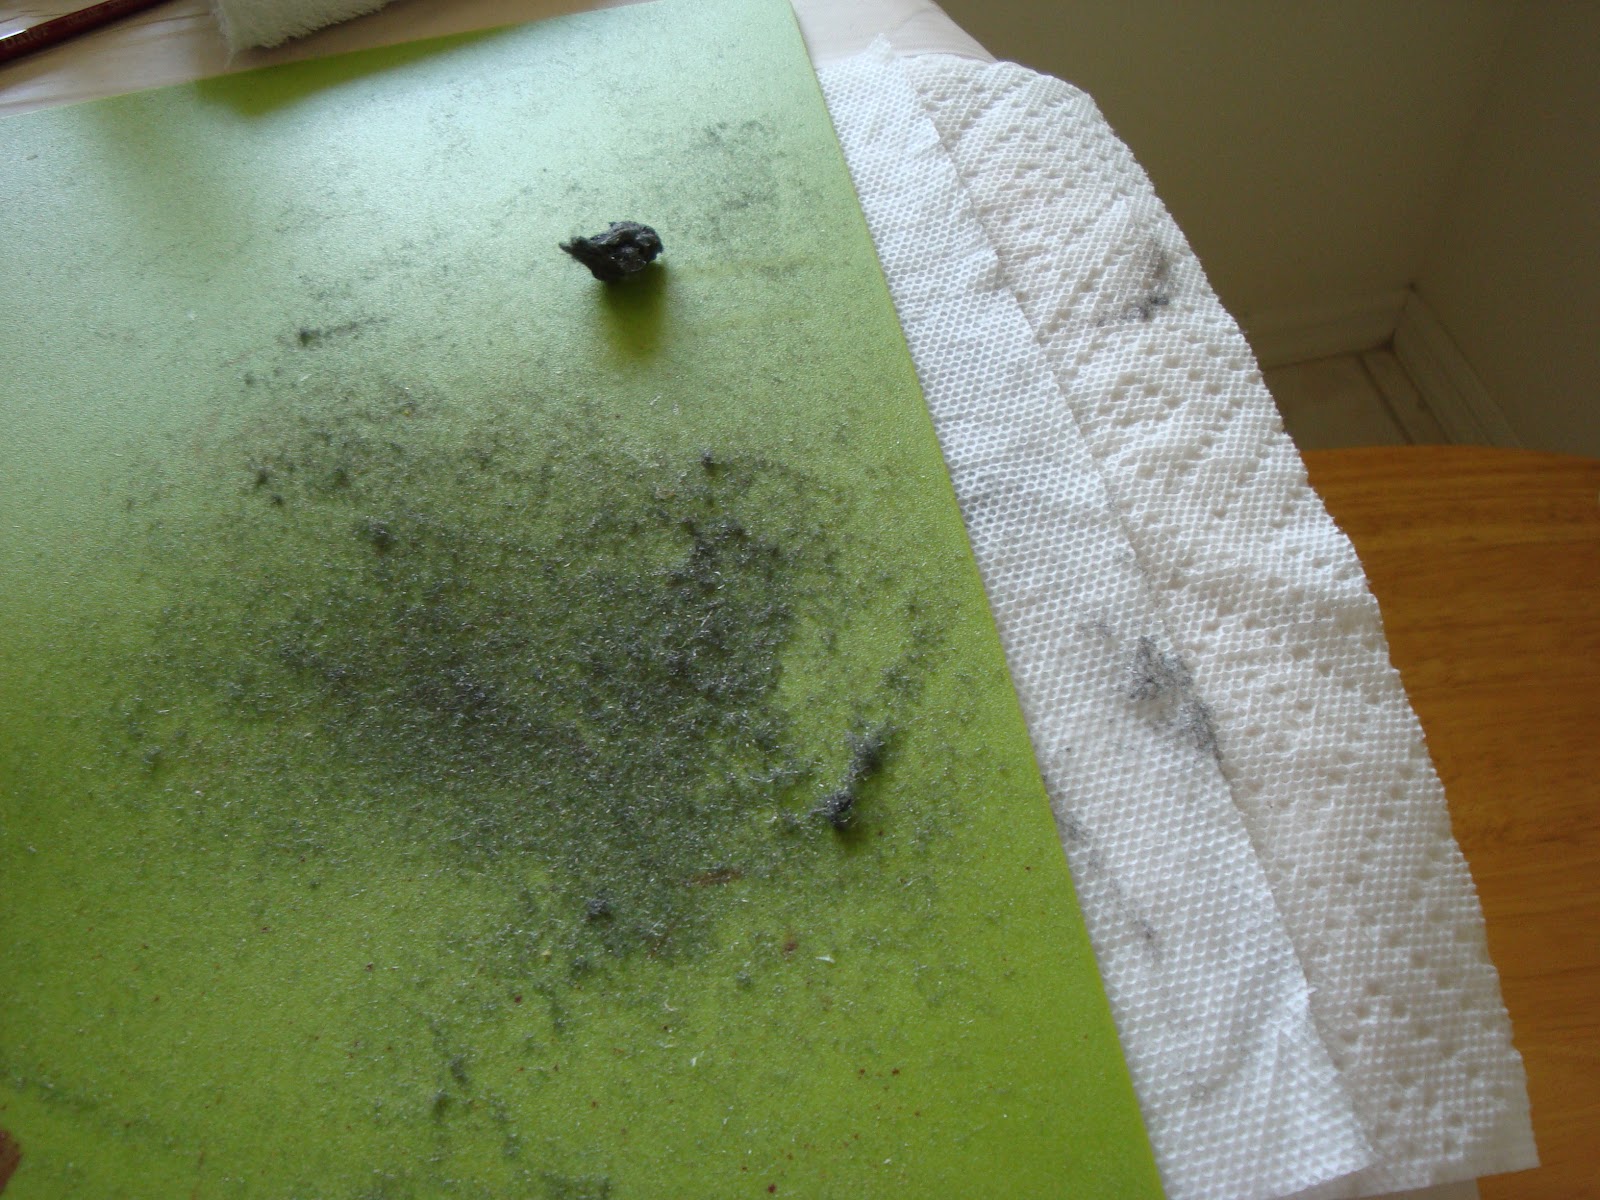
Warning!  Wire wool makes a terrific mess.  Do not sit near a breeze when you do this.  You get a heap of very, very fine wire dust as you bowl along.  The piece of kitchen roll I wedged under the edge of my board (as the dust was escaping onto the table) was damp (ready to clean up) and it held on to the rubbish a lot better than the board - I'm going to try covering all the work area that way next time.


When all the pieces were silky I had a go with the tinted glaze.  The idea is to cover the piece, leave it a couple of minutes and then rub it off in a way which would make the piece look used.  I understand the dynamics of polished furniture and that you'd have a lighter centre on the top of the piece and lighter areas maybe on the sides (from exposure to light) and lighter areas on the drawers.  That said I found I didn't have the detailed know-how or dexterity to achieve this. I did my best but I can see where it falls short. 
 

If you are really going for authenticity when making these things I suggest you are cheeky and have a good look at life size pieces in antique shops (etc), even take pictures where you can, because when you come to replicate them I bet you'd be surprised how little detail you actually know.  Of course, you'll be fine if you are living with real 18th century Chippendale!

Here I am struggling with the artistic wiping of a side panel.


As you can see here I didn't glaze the drawer boxes as they aren't fully finished in real furniture (hence my forgetting to wire wool them).  I posted this photo because it shows how much better the furniture looks with the dark glaze applied - it knocks back that awful (cheap) orange finish that the mahogany stain gives the wood.  That colour is one of the reasons I don't like so much of the furniture you can buy, even at the top end of the market.  I hope that when this has its final semi-shiny coat it will look just fine. Kris mentioned a gel clear finish which I shall be hunting for tomorrow.  Watch this space.  Now I am up to the next frustrating stage...... 'leave for 24 hours to dry'...   speak to you tomorrow, decorators aside. (read Clavering for that!)


New Blog to follow


I've added a third Blog to my list of blogs which I follow called Dollhouse Miniature Furniture Tutorials/1inch Minis.   It is crammed with much more than that and, even better, does have wonderful tutorials for all kinds of things, so you can make your own stuff.  The owner Kris has just been absolutely brilliant ...  I sent an email asking if she had any tutorial (which I couldn't find) about finishing wooden furniture and immediately she wrote me three lovely emails absolutely bursting with help.  I can't wait to follow her blog to see what comes up next. She has even promised me a (mock) iron bed tutorial next year. (Yes, she is that booked up!)

I want to say a big thank you to Linda for becoming a follower  - I am so flattered as she is the owner of  Une Petite Folie which has to be the epitome of doll housing and a dream to aim for.  

It would be lovely to see other followers on all my Blogs and it won't leave Linda all lonely out there on her own!  Please sign up if you are a regular visitor as it is lovely to see who is popping in now and then.  From the Stats I collect I know readers (or visits to the sites) are in the hundreds and I even get emails from a handful of you so I actually do have names/personalities here and there but more would be very welcome.  Comments posted on the site too are always welcome


Saturday, 19 November 2011

2. House of Miniatures - staining and sealing

OK, day two!

My first big problem was that the House of Miniatures Finishing Kit box didn't contain any instructions.  Another issue which concerns me is that it is probably something like twenty to thirty years old and that might mean the various chemicals are way beyond their usable time.  Hey ho, I bought it I'm going to try it.  

I found something like the instructions on line almost accidentally.  I was looking at some instructions for another kit which someone had copied and posted and within those was a section called Final Finishing which seemed to cover what I needed. I copied it with my computer snipping tool (if you don't know what this is - ask me - just brilliant - it means you can copy anything from any page you are looking at, even ones which don't allow any other sort of copying) and I printed it and Bob's your uncle, I was off.

First complaint - the print is teeny even after enlarging and the instructions verbose - for me to say that you know it must be bad.

It begins with three more sessions of sanding - none of which I did.  It then suggests you go over all the end grains with a thin coat of sealer to prevent them sucking up stain and being darker than the rest.  I did a quick inspection of my piece and decided I could live with the areas which would be darker - so that was another thing skipped, especially as you would have to be very dexterous to avoid any overlap onto the other areas.

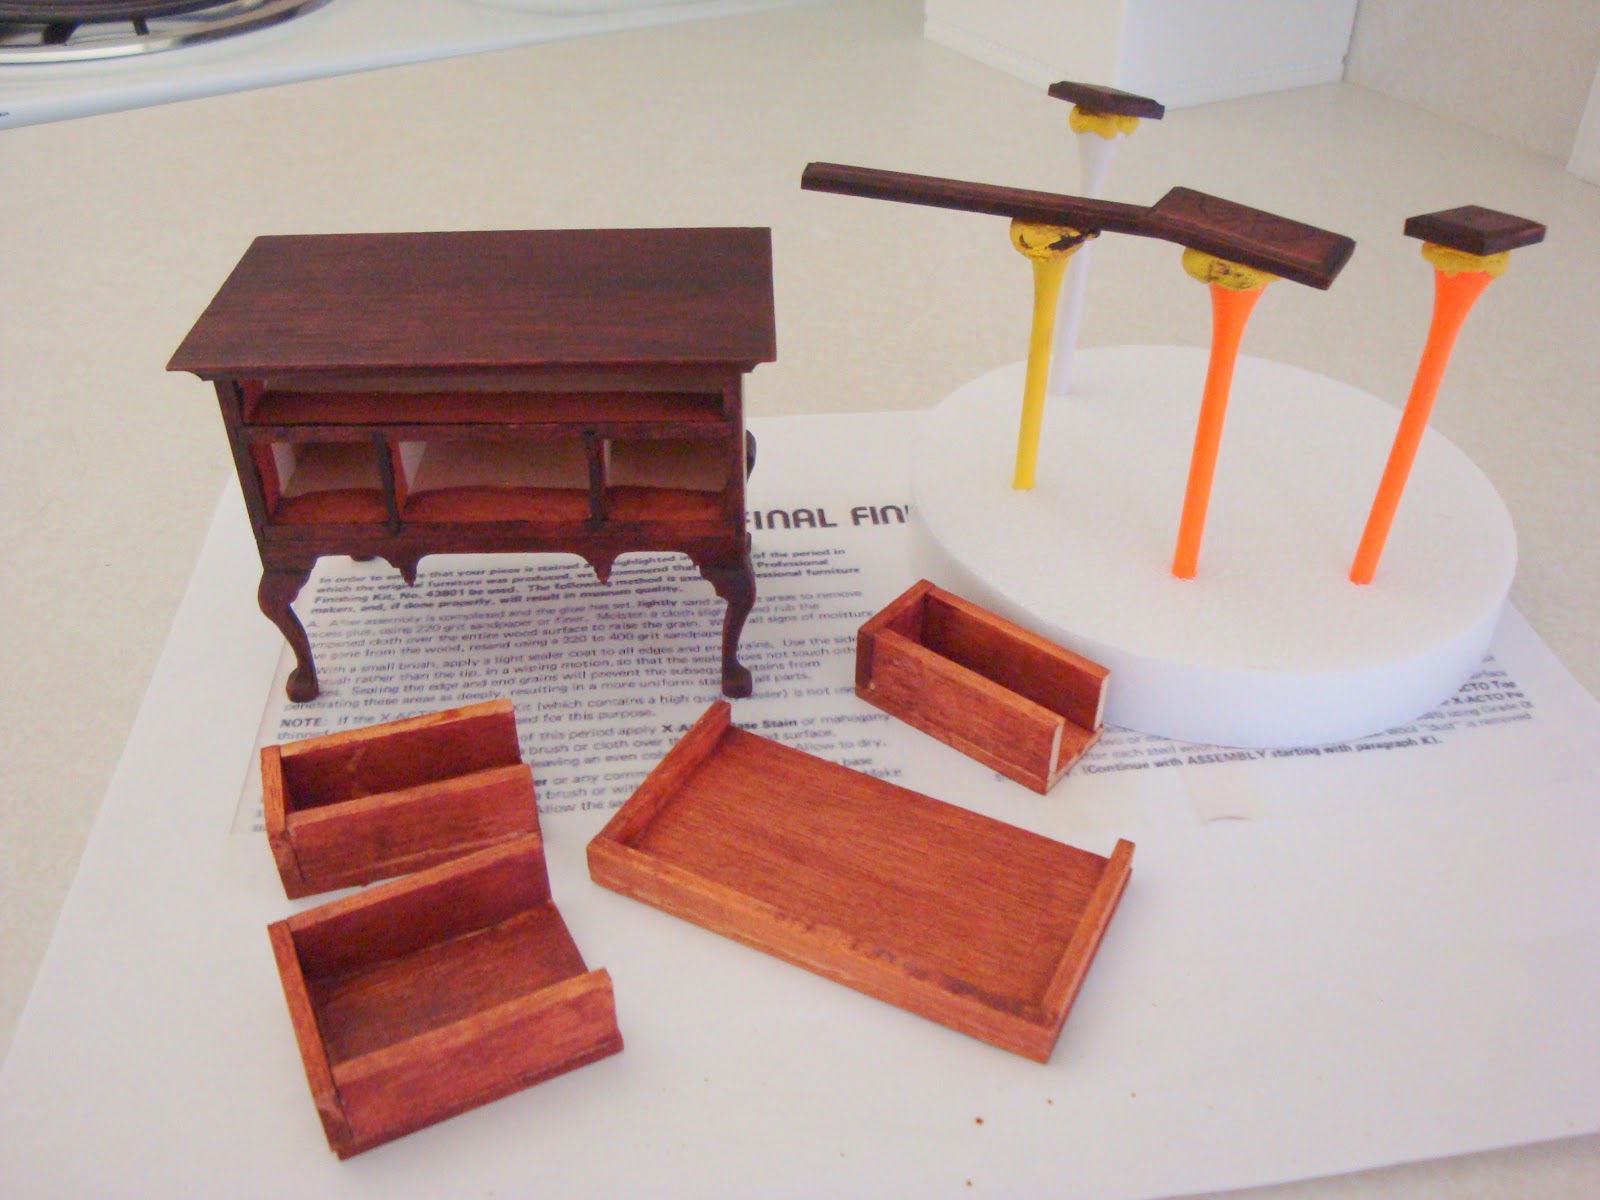
Finally (many paragraphs later) we get to where I want to be - applying the base stain. This was easier than I thought.  I did it with a paint brush and wiped off the excess as I went along.  In this photo you can see that the stain won't cover any glue (as warned) but I absolutely stick by my decision not to bother with the fuss and expense of tinting glue.  It might be worth it if you can buy it ready done(?).  Just be really careful when  you are gluing the pieces together; use the absolute minimum amount of glue and choose something which has less tendency to run or squeeze out. I put on the tiniest bit of tacky glue on both pieces, smoothed it out with my finger so there wasn't any excess sitting on the surface, waited for it to go tacky and then pressed the two pieces together.  I deliberately wasn't as careful with the drawers as I wanted to see what would happen if I did it more quickly.

This isn't the most flattering photo of the piece so far but I wanted to show you that if you are careful with the glue there really isn't a problem.  The wood itself takes colour in different amounts so you get light areas any way.  I don't see any glue patches in or around the joins or any glaringly dark end pieces of wood.  It all seems pretty even to me.  


When the base stain is dry you have to go over the piece with wood sealer.  This was done in a similar way - applying a thin coat with a brush.  I thought this might be the slightly glossy finish I am looking for but as it dries it seems to disappear, so it is obviously performing another function.  This photo is to show you a handy tip for gluing or painting small bits and bobs which you'd like to twist and turn and do the edges etc.  A blob of Blu-tack, a golf tee and some styrene solves the problem beautifully.  I'm actually using plasticine here but maybe not a good idea as I can see colour from it on my gloves - I may have drawer fronts with a strange yellow tint on the back, we'll see.  I can't remember what Blu-tack's called in the USA but I'm sure you know the sort of reusable 'putty' I mean. The 25 golf tees cost me 50 cents from a dollar shop (and it came with a bunch of golf 'tools').  The styrene discs were two for a buck from the flower arranging section of the same shop but any scrap packaging styrene will do as long as it is nice and steady.


Finally, the worst instruction ever to someone like me - allow to dry for at least six hours.  So here it sits on the kitchen table until tomorrow.  I might even do some sanding then.....